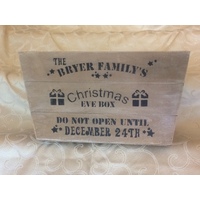
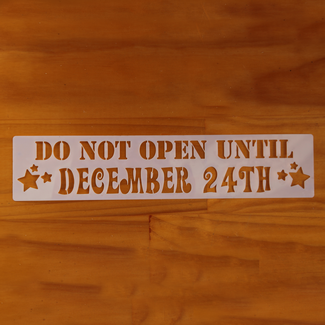
How to use and Care for Mylar Stencils
Author: Gifted From The Heart Date Posted:14 October 2018

Mylar stencils are a wonderful DIY tool.

Author: Gifted From The Heart Date Posted:14 October 2018

Mylar stencils are a wonderful DIY tool.

Welcome to our website. If you continue to browse and use this website, you are agreeing to comply with and be bound by the following terms and conditions of use, which together with our privacy policy govern Gifted From the Heart’s relationship with you in relation to this website. If you disagree with any part of these terms and conditions, please do not use our website.
The term ‘Gifted From the Heart’ or ‘us’ or ‘we’ refers to the owner of the website whose registered office is Unit 19, 13 Gibbens Road West Gosford NSW 2250 Australia. Our ABN is 95 614 508 744 . The term ‘you’ refers to the user or viewer of our website.
The use of this website is subject to the following terms of use:
Gifted From The Heart provides an online shop via the Gifted From The Heart website which is operated wholly by Gifted From The Heart (the “Company”, “we” or “us”) for users (“you”). This Privacy Policy sets forth our policy with respect to information that is collected from visitors to the GiftedFromTheHeart.com.au web site, or when you use any of GiftedFromTheHeart.com.au's other services. Under applicable law, Gifted From The Heart is the “data controller” of personal data collected through the website.
This policy does not apply to the practices of companies that GiftedFromTheHeart.com.au does not own or control, or to people that GiftedFromTheHeart.com.au does not employ or manage.
Information We Collect:
GiftedFromTheHeart.com.au collects personal information when you voluntarily provide such information, such as when you place an order on GiftedFromTheHeart.com.au, or register for a GiftedFromTheHeart.com.au account or register for the newsletter. Information we collect may include but not be limited to username, email address, and any messages or other content you send via the contact us page.
Information you supply when placing an order will only be used in fulfilment of that order. For your convenience, we store this information for future potential orders. This information is only accessible using your password that you set when registering for the first time.
If you choose to register to our newsletter, you will receive email messages from GiftedFromTheHeart.com.au only.
Other Information
If you do not wish to receive personalized advertising that is delivered by third parties outside of the Gifted From The Heart website, you may be able to exercise that choice through opt-out programs that are administered by third parties, including the Network Advertising Initiative (NAI), the Digital Advertising Alliance (DAA). Our Services currently do not respond to “Do Not Track” (DNT) signals and operate as described in this Privacy Policy whether or not a DNT signal is received, as there is no consistent industry standard for compliance.
Where Information Is Processed
The Company is based in Australia. No matter where you are located, you consent to the processing and transferring of your information in and to Australia and other countries. The laws of Australia and other countries governing data collection and use may not be as comprehensive or protective as the laws of the country where you live.
Gifted From The Heart's Use of Your Information
We use the information you provide in a manner that is consistent with this Privacy Policy. If you provide information for a certain reason, we may use the information in connection with the reason for which it was provided. For instance, if you contact us by email, we will use the information you provide to answer your question or resolve your problem. Also, if you provide information in order to obtain access to the website, we will use your information to provide you with access to the website and to monitor your use of the website. The Company and its subsidiaries and affiliates (the “Related Companies”) may also use your information collected through the website to help us improve the content and functionality of the website, to better understand our users and to improve the website. The Company and its affiliates may use this information to contact you in the future to tell you about services and/or information we believe will be of interest to you. If we do so, each marketing communication we send you will contain instructions permitting you to "opt-out" of receiving future marketing communications. In addition, if at any time you wish not to receive any future marketing communications or you wish to have your name deleted from our mailing lists, please contact us as indicated below.
Our Legal Bases For Handling of Your Personal Data
The laws in some jurisdictions require companies to tell you about the legal ground they rely on to use or disclose your personal data. To the extent those laws apply, our legal grounds are as follows:
Our Disclosure of Your Information
Gifted From The Heart will not sell or rent your personal information to anyone. We consider this information to be a vital part of our relationship with you. There are, however, certain circumstances in which we may share your information with certain third parties, as set forth below:
Unsolicited Information
You may provide us with ideas for new products or modifications to existing products, and other unsolicited submissions (collectively, “Unsolicited Information”). All Unsolicited Information shall be deemed to be non-confidential and we shall be free to reproduce, use, disclose, and distribute such Unsolicited Information to others without limitation or attribution.
Links to Other Websites
This Privacy Policy applies only to this website. This website may contain links to other web sites not operated or controlled by us (the “Third Party Sites”). The policies and procedures we described here do not apply to the Third Party Sites. The links from the Services do not imply that we endorse or have reviewed the Third Party Sites. We suggest contacting those sites directly for information on their privacy policies.
Data Retention
We generally retain personal data for so long as it may be relevant to the purposes identified herein. To dispose of personal data, we may anonymize it, delete it or take other appropriate steps. Data may persist in copies made for backup and business continuity purposes for additional time.
Security
We take reasonable steps to protect the information provided via the website from loss, misuse, and unauthorized access, disclosure, alteration, or destruction. However, no Internet or email transmission is ever fully secure or error free. In particular, email sent to or from the website may not be secure. Therefore, you should take special care in deciding what information you send to us via email. Please keep this in mind when disclosing any information via the Internet.
Children
Gifted From The Heart does not sell products for purchase by children. If you are under 18, you may use Gifted From The Heart.com.au only with involvement of a parent or guardian. If you are a parent or guardian of a child under the age of 13 and believe he or she has disclosed personal information to us please contact us at customer.care@giftedfromtheheart.com.au. For residents of the EEA, where processing of personal information is based on consent, Gifted From The Heart will not knowingly engage in that processing for users under the age of consent established by applicable data protection law. If we learn that we are engaged in that processing with such users, we will halt such processing and will take reasonable measures to promptly remove applicable information from our records.
Your Data Rights and Choices
We believe that users should be treated equally no matter where they are, and so we are making the following options to control your data available to all users, regardless of their location. You can update certain information by accessing your account. You can also unsubscribe from certain emails by clicking the “unsubscribe” link they contain. Individuals outside Australia have certain legal rights to obtain confirmation of whether we hold personal data about them, to access personal data we hold about them (including, in some cases, in portable form), and to obtain its correction, update, amendment or deletion in appropriate circumstances. They may also object to our uses or disclosures of personal data, to request a restriction on its processing, or withdraw any consent, though such actions typically will not have retroactive effect. They also will not affect our ability to continue processing data in lawful ways.
If you would like to submit a data access request, you can do so via the contact us page. We will then start the process and provide you the personal data that Gifted From The Heart has on you within 30 days.
In addition to the functionality available through the account area on our website in which you can correct, update, amend, or delete certain personal data, you can also request other modifications from us directly. Please write us at customer.care@giftedfromtheheart.com.au with the words “Personal Data Request” in the subject or body of your message, along with an explanation of what data subject right you are seeking to exercise. For your protection, we may take steps to verify identity before responding to your request.
You have a right to ask us to stop using or limit our use of your personal data in certain circumstances—for example, if we have no lawful basis to keep using your data, or if you think your personal data is inaccurate. Gifted From The Heart offers you the ability to restrict the processing of your data for specific uses, which you can find in the account page. Individuals in the European Economic Area have the right to opt out of all of our processing of their personal data for direct marketing purposes. To exercise this right, click the “unsubscribe” link in any of our marketing emails. The rights and options described above are subject to limitations and exceptions under applicable law. In addition to those rights, you have the right to lodge a complaint with the relevant supervisory authority. However, we encourage you to contact us first, and we will do our very best to resolve your concern.
Changes to this Privacy Policy
We reserve the right to update or modify this Privacy Policy at any time and from time to time without prior notice. Please review this policy periodically, and especially before you provide any information. This Privacy Policy was last updated on the date indicated above. Your continued use of the website after any changes or revisions to this Privacy Policy shall indicate your agreement with the terms of such revised Privacy Policy.
Contacting Us
If you have any questions about this privacy policy, please contact us at customer.care@giftedfromtheheart.com.au.


Add your favourites to cart

Select Afterpay at checkout

Log into or create your Afterpay account, with instant approval decision

Your purchase will be split into 4 payments, payable every 2 weeks
All you need to apply is to have a debit or credit card, to be over 18 years of age, and to be a resident of country offering Afterpay
Late fees and additional eligibility criteria apply. The first payment may be due at the time of purchase
For complete terms visit afterpay.com/terms
